I’m creating a Workshop and want to allow users to upload a media item (it’s a document for my use case). I want to create an object with this document and also save the extracted text from the document on the object too.
How do I achieve this?
I’m creating a Workshop and want to allow users to upload a media item (it’s a document for my use case). I want to create an object with this document and also save the extracted text from the document on the object too.
How do I achieve this?
Currently, it isn’t possible to create a function-backed action with the option to upload media (ie. with the file picker interface). This is being worked on by the media team, but there are 2 workarounds in the meantime:
Each approach has it’s own pros and cons, and the functions you write will need to be slightly different depending on the approach you take.
In both workarounds, it is assumed that you have already set up the Object type for your documents, and that the object type has a media reference property that will reference the document file.
1. Use Actions & Automate
In this workaround, we will be using an Action to create the object, and then using Automate to run our function to populate the extracted text.
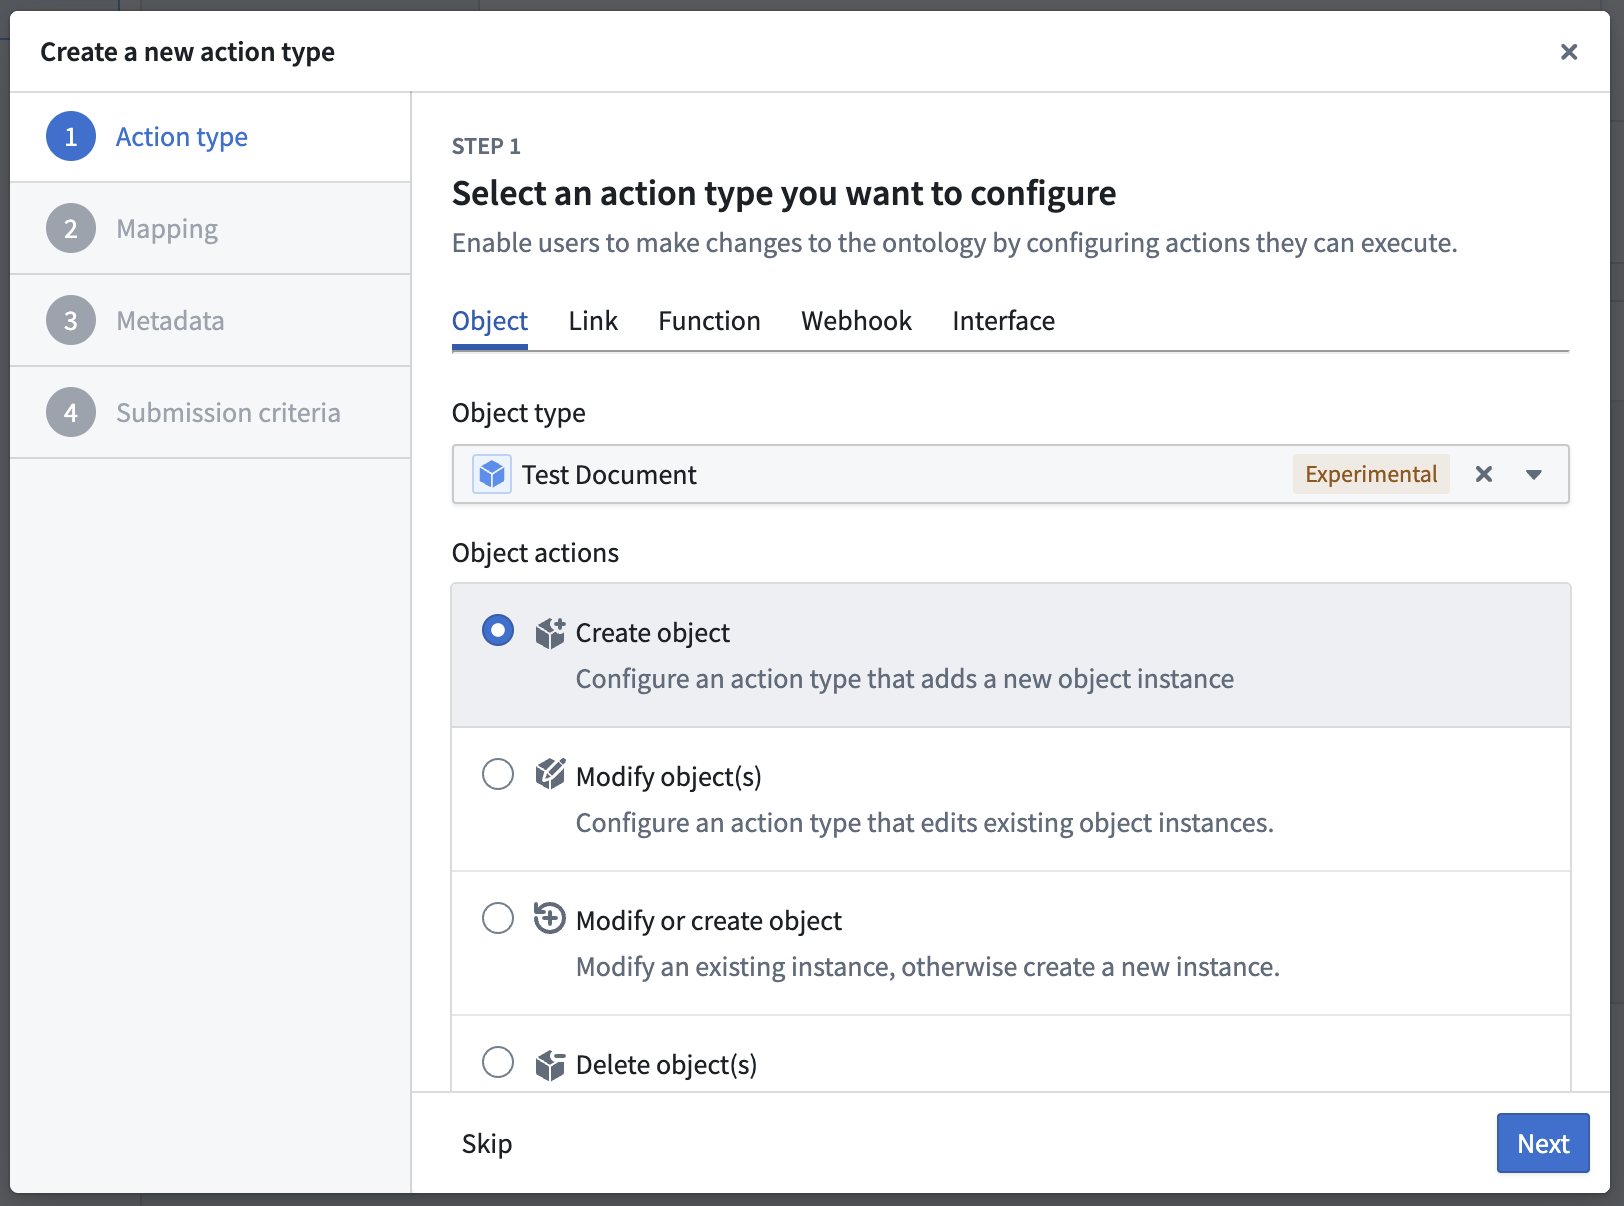
First, create an Action (object-based) that creates an object on your Document object type.
Make sure you add your media reference property as one of the action parameters. Finish setting up the action as you wish by giving it the relevant name/description and security settings. Your action form should look something like this, where users can select the file they wish to upload.
Go ahead and save your new action. You can now invoke this action in a workshop by using the button group widget. When configuring the button group widget, you should select ‘Action’ for ‘On click’ and then choose the action you’ve just created.
Next, we need to write the function to extract the text from the uploaded document. You can create a new functions code repository, or use an existing one for this.
As the document object will be created (by the action) before the function is run, we should provide this object as the argument to the function. In the function, we can then extract text from the document and write this back to our extracted text property.
Here is a function that achieves this:
@OntologyEditFunction()
@Edits(TestDocument)
public async extractTextAndSaveToObject(document: TestDocument): Promise<void> {
    if (MediaItem.isDocument(document.mediaReference!)) {
        const extracted_text = await document.mediaReference.extractTextAsync({});
        document.textContent = extracted_text[0];
    }
}
Note that we need the OntologyEditFunction and Edits annotations as we are editing the object that was created in our action.
Publish your function as usual.
Head back to Ontology Manager to create a function-backed action using the function you’ve just written and published. Follow the prompts to finish setting up the action and save it.
Finally, we will use Automate to ensure this function-backed action is run whenever a new document object is created.
In Automate, click ‘New Automation’ in the top right corner. Select ‘Objects added to set’ as the condition for running the automation.
Select your object type.
Next, add ‘Action’ as an effect. You can then select the function-backed action you just created.
Follow the remaining steps to finish setting up your automation. Now, whenever a new Document object is created, your function will run to extract the text from the document and save it to the object.
Pros:
Cons:
2. Use Media Uploader Widget & Actions
In this workaround, we will use the Media Uploader widget in Workshop to allow users to upload the document, and then pass this uploaded document to a function-backed action.
Let’s start by defining our function. You can either create a new functions code repository, or use an existing one for this. Unlike the function we defined in the previous workaround, we will be taking an existing media reference as the function argument.
The ‘MediaItem’ type in TypeScript represents a media reference. Below is a function that takes in a media reference and creates a new document object. It populates the text content property with the extracted text and the media reference property too.
@OntologyEditFunction()
@Edits(TestDocument)
public async createNewDocumentWithContents(mediaItem: MediaItem): Promise<void> {
    if (MediaItem.isDocument(mediaItem)) {
        const newDocument = Objects.create().testDocument(Date.now().toString());
        const extracted_text = await mediaItem.extractTextAsync({});
        newDocument.textContent = extracted_text[0];
        newDocument.mediaReference = mediaItem;
    }
}
Make sure you publish your function and tag it as usual.
Next, we want to create a function-backed action in Ontology Manager. Select the function you’ve just written and published, and follow the prompts to set up the action.
You will notice that the form has a text input field for the media reference, rather than the file picker which appears for non function-backed actions. The text input field allows you to pass in an existing media reference, which we’ll do next. Save the action you’ve just configured.
In Workshop, you can now use the Media Uploader widget. In the Upload section of the configuration, select the media set that backs your media reference property on your document object. This defines where the media will be uploaded to.
In the Output section, select the function-backed action that you just created. Then click ‘Select parameter to configure’, choose ‘Media Item’ and then select ‘Uploaded file’. It is then recommended to set the visibility to ‘Hidden’ so users don’t see the media reference being passed to the action.
This means that whenever a file is uploaded using the widget, the media reference to that file is passed to the action and the function will be run.
Pros:
Cons: